Time Off |
  
|
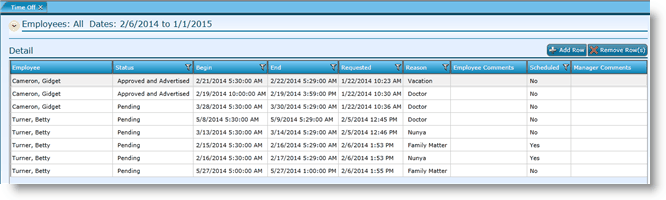
Time Off |
|
Labor Manager > Labor & Scheduling > Time Off
Adding Time Off for an Employee
Employees can log in to their MyWorkforce account and request time off. These requests are then queued up in the time off screen for managers to either approve or deny. Managers can also manually enter these requests on behalf of employees. Black out days may be configured by entity.
1.To restrict the a specific employee, click on the magnifying glass, choose the employee from the grid and either double click on the employee name or click on the record once and then click the OK button. To clear the name of any employee in the Employee field, click on the red X.
2.Enter a date range in the Date Range fields.
3.To restrict to a specific job, choose it from the drop-down.
4.Click the Retrieve Data button.
1.Enter a date range in the Date Range fields.
2.Click the Retrieve Data button.
Note that you can also combine the search fields to look for a specific employee within a date range.
You can sort by any column in the grid by clicking on the blue header. For more information on Sorting Grids, visit the Tools section.
You can also filter by any column in the grid. For more information on Filtering Grids, visit the Tools section.
1.Click in the Status field of the record you want to approve or deny.
2.Select 'Approve' or 'Deny' from the drop-down.
3.Click the Save button.
1.Click on the Add Row button.
2.Click in the Employee field and select the employee who is requesting time off.
3.Click in the Status field and choose the appropriate status from the drop-down.
a.Pending - This is the state the request is in before a manager acts on it.
b.Approved - This indicates that a time off request has been approved.
c.Denied - This indicates that a time off request has been denied.
d.Canceled - This indicates that a time off request has been canceled.
e.Approved and Advertised - This indicates that a time off request has been approved and the shift has been advertised to all available as a house shift.
4.Click in the Begin field and enter the date and time the time off is to begin.
5.Click in the End field and enter the date and time the time off is to end.
6.Leave the Requested field blank. It will fill in with the date and time the entry is made.
7.Click in the Reason field and choose a reason from the drop-down. To add a reason, go to the time off reasons section.
8.A time off reasons is always required. Click in the Reason field and select the appropriate reason from the drop-down.
9.If the employee has provided a comment, it will show here in the Employee Comments field.
10.You will not be able to edit the Scheduled field. This will populate when the employee submits a request or after a manager enters the time off request. If entering time off for an employee, it is recommended that the manager first check schedules for the date(s) the employee is requesting off before entering the time off request.
11. Any manager comments may be included in the Manager Comments field. If denied, these comments will appear in myWorkforce. Approved requests will include the comments in email notifications if the employee has elected to receive notifications via email.
12. Click the Save button.
When a time off request is removed, the request and its status remains valid. Removing the record simply clears it from the report. Note that when a record is deleted, it will be logged in the audit log for future reference.
1.Highlight the record you want to remove by clicking on any field.
2.Click the Remove Row(s) button.
3.Click the Save button.
Send feedback on this topic.