Schedule templates can be created to provide a set collection of scheduled shifts without having to create each individual shift. Once a template has been created, users have the option to apply any future changes to the schedule or to the schedule and the template from which it was created. Note that users will need to be in a group that provides them the ability to Allow Template Edits in order to create or edit any schedule templates.
1.Create a schedule that will serve as the template.
2.Click on the Edit Templates icon.
![]()
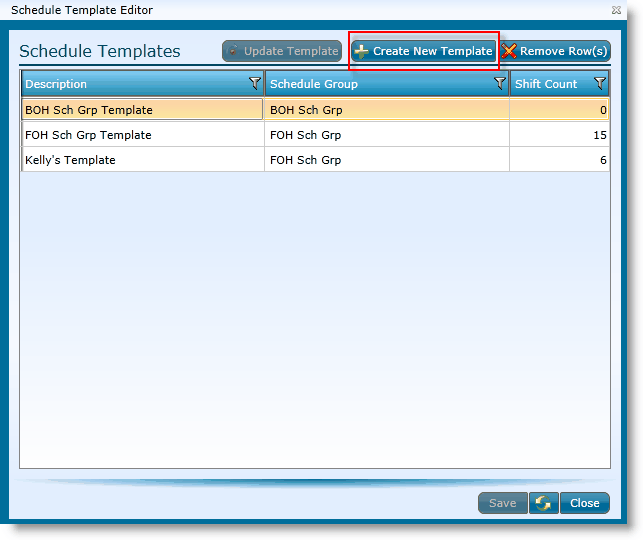
3.Click the Create New Template button.

4.Enter a Description for the template.
5.Click the OK button.
6.Click the Save button.
If you are certain that no shift changes have been made, you can edit a template by opening a schedule or posted schedule that was created from the template. If shift changes have been made since the posting of the schedule, those changes will be saved in the template as well as any changes you have made. If you are unsure if shift changes have been made, you may want to consider editing the template without affecting any current schedules. Please see option 2 below.
1.Open the schedule.
2.Edit the schedule to incorporate the changes to the template.
3.Click on the Edit Templates icon.
4.Select the template you want to overwrite by clicking on it.
5.Click the Update Template button.
6.Type 'Yes' when prompted.
7.Click the OK button.
8.Click the Close button.
If shift swaps or changes have been requested since the schedule was posted, you may not want to use a current schedule to edit the template. In this case, you can make a schedule for a future date, edit it, save the template and then delete the schedule without posting it.
1.Create a schedule for a week in the future that has not yet been scheduled.
2.In the Load from field, select the template you want to edit.
3.Click the Save button.
4.Edit the schedule to incorporate the changes you want made to the template.
5.Click on the Edit Templates icon.
6.Select the template you want to overwrite by clicking on it.
7.Click the Update Template button.
8.Type 'Yes' when prompted.
9.Click the OK button. The template is now updated.
10. Click the Close button.
11. Close the schedule by clicking on the X.
12. From the schedule list, click on the future schedule just created.
13. Click on the Delete button.
14. Click the Yes button.
Note: Any time a user who is in a group with the rights to edit templates edits a schedule that was originally built from a template, any edits to the schedule will prompt the user to save those changes to the template. To save the edits to the template, click the Update button. To not save the edits to the template, click the Skip button.
1.Open any schedule or posted schedule.
2.Click on the Edit Templates icon.
3.Select the template you want to delete by clicking on it.
4.Click the Remove Row(s) button.
5.Click the Save button.
Send feedback on this topic.