Importing invoices allows you import invoices and credit memos contained in text files, from vendors or from other systems. It allows importing line-item detail based on the information on the Par Levels/ Vendor Info tab (Restaurant Inventory Items) in Compeat. It is also possible to import GL account-detail invoices, using the Compeat or ‘External GL Account’ number defined for each account in the Chart of Accounts.
Access the screen under File > Import Data > Import Invoices (Templates).
Here is how the process works:
Compeat will attempt to match the items in the invoice file to items in the restaurant inventory. Based on your invoice template settings, Compeat will compare the item code, split case indicator, variable weight indicator, and/or pack size that are in the invoice file, to the entries on the Par Levels/Vendor info tab of the restaurant inventory items. If an exact match is found, ‘Exact Match’ is entered in the item’s ‘Status’ column. This means that the match can be accepted, and added to the invoice in Compeat when the invoices are created. For some items, Compeat may enter ‘Match’ in the item’s status column. This can be for several possible reasons:
The vendor and vendor item code are assigned to multiple items in the restaurant inventory.
The vendor item code and/or pack size is defined for multiple purchase units for the same restaurant inventory item, on the item’s Par Levels/Vendor Info tab.
The item is available as a split case item, but the item is not correctly defined as a split case item in Compeat.
The item is a catch or variable-weight item, but the item is not correctly defined as a catch weight item in Compeat.
If Compeat is unable to find any match for an item from the invoice file in the restaurant inventory, ‘New’ is entered in the status column. This usually means that the vendor and item code aren’t assigned to any restaurant inventory item in Compeat, or the item itself isn’t defined in Compeat.
If a record in the file doesn’t contain enough valid information about the item (missing item code, for example), ‘Invalid’ is entered in the status column.
For items marked ‘Match’, double-click the item or highlight its row and click ‘Find Match’. A window will open with a list of the possible matches for the item that Compeat found in the restaurant inventory:
Double-click the entry that is an exact match for the entry in the invoice file. Compeat will accept this as an exact match, and the status will change to ‘Exact Match’. If you wish to ensure that the match you selected is an Exact Match every time you import invoices for the selected vendor, either remove the other matching entries from the inventory item(s), or check the ‘Order Guide Default’ box next to the entry on the item’s Par Levels/Vendor Info tab.
For items marked ‘New’, you can create an Exact Match entry to a restaurant inventory item by double-clicking the item. A window will open, allowing you to choose a restaurant inventory item and purchase unit to match the item to:
When ‘OK’ is clicked after the item and purchase units are selected, the item’s status will change to ‘Exact Match’, and the vendor information from the invoice import will be added to the Par Levels/Vendor Info tab of the Restaurant Inventory Item when the items are processed. If the item is not set up in Compeat as an inventory item, this will need to be done before you can assign invoice import vendor info to it and update its pricing.
You can also highlight individual rows in the grid and click ‘Accept’ to accept individual items.
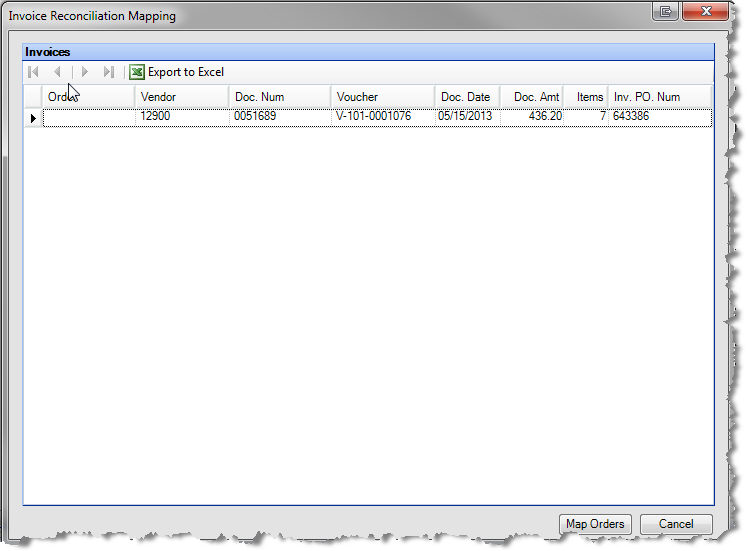
If the file you imported contained a PO number and it was successfully matched to an order, you will see the PO number in the 'Order' column next to the voucher it corresponds to. If the file did not contain a PO number, or it did but the number could not automatically be matched to an existing order, select the order PO number from the drop-down.
Once all orders have been mapped to the vouchers they correspond to, click the 'Map Orders' button to reconcile the invoices to the orders. The results of the reconciliation can be seen in the AP Invoices screen.
Note: Columns will/will not populate based on which columns are mapped in the invoice import template, and the data contained in the file being imported.
Toolbar buttons are available on the screen to perform the following actions:
• Web Address Click to connect to the vendor web or ftp site specified in the invoice template.
• Reprocess Use to go through the matching process again after you have added inventory items into Compeat.
• Import Click to import the invoice file specified.
• Create Invoices Click to generate invoices for accepted items.
• View Log Click to view the log file, if you receive a message during the import that errors occurred.
• Accept All Exact Matches Clicking this button will change the Status of all items marked Exact Match to Accepted. Items must be accepted before they can be added to invoices.
• Accept Clicking this button will change the Status of the highlighted item to Accepted, if there is an exact match.
Note: You can highlight multiple items using Ctrl+Click and a range using Shift+Click.
• Find Match Shows potential matches for highlighted item (use with Match status items).
• Find Item Opens a search window for locating a specific item in the list.
• Delete Deletes the highlighted item.
• Delete All Deletes all items from the list.
• Revert Changes Removes any changes to a selected line item, such as manually matching to a Restaurant Inventory Item or assigning a GL account.
• Assign to GL Account Allows a single selected line item with 'New' status to be changed to import as a GL account assignment instead of as an inventory item. Highlight the item you wish to assign, and click 'Assign to GL Account'. A window similar to this will open:
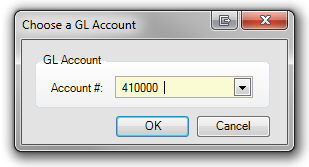
Select the GL account you wish to assign the selected line item to and click 'OK'. The item's status will change to 'GL', and the selected account number will populate in the 'GL Acct #' column. When the invoice is generated, the item will show as a GL account, not as an inventory item.