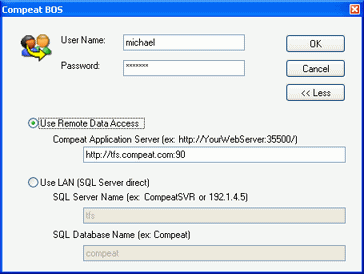
When you start Compeat, you are prompted to log in to the system with a User Name and Password. Basic configurations to the server, including login information should be made during installation. Once these have been set, you can simply enter your user name and password to continue.

Note: passwords can be reset by users with appropriate authority in the Users screen.
To make changes to the server settings or view the server you are logging into, click More >>. You will be shown an expanded window with server options.

You have the following options for server access:
Use Remote Data Access Enter the web address of the Compeat Application Server.
Remote data access allows communication with the database specified by the Compeat Application Server configuration file to send and receive data via HTTP. The address is determined by the Compeat Application Server installation and the server network's design. Using remote data access allows for communication with the server without the client and server being on the same local area network. Remote access provides greater security because users do not require a login on SQL Server (which could allow them to access Compeat data from outside Compeat).
Use LAN Enter the computer name of the server that hosts the Compeat database and the name of the Compeat database. Using LAN, your system communicates directly with the SQL Server database engine to send and receive data. It uses the Named Pipes protocol to send and receive data if the client and server reside on different computers. The client and server must be on the same local area network or be connected on some type of virtual private network. LAN users must have SQL Server logins that use SQL authentication.
Note: Compeat will remember the server and database names you enter, and will display them in a drop-down list. To remove an item from the list, select it and then press the Delete key on your keyboard.
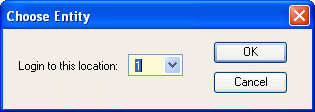
After logging in, you will be asked to select an entity.

Select the entity that you wish to access from the drop-down menu and then click OK to continue (you can always change entities from within the program once you are logged in).