The Recurring General Journals screen allows you to enter a batch of recurring journal entries, give the batch a descriptive name, and schedule the batch to recur periodically. This is useful for journal entries such as depreciation that are consistent and periodic.
The first time anyone logs into Compeat on a new date, the system will check for recurring entries that should have been made since each scheduled batch was last run. If it finds one, the first user who logs in with access to the General Journals screen will be notified that there are new recurring batches that need to be posted.
When you first select Recurring General Journals, the Select a Recurring General Journal Batch screen will display, where you can select Create Batch or Edit Batch. When creating a new batch, you will be required to enter a description before accessing the Recurring General Journals screen.
Access the Recurring General Journals under Transactions > Journal Entries.
Recurring General Journals share most features of the General Journals screen, with the following differences:
Title The Batch Description you are prompted to give when you first create a recurring general journal entry is carried onto the title bar of this screen.
Schedule Batch This button replaces the Complete and Post buttons of the regular General Journals screen, and all date fields are disabled. The Schedule Batch button is used to define the schedule of a recurring batch.
Apply Date and Auto-Rev Date These fields will not be active in this screen because dates will be created based on the schedule you setup.
When you click the Schedule Batch button, the Schedule a Batch screen appears:
Description of fields:
Batch Code/Description This is the recurring general journals batch identifier.
Detail Panel This panel displays all the schedule Names and Descriptions that have been defined in the Schedule screen (see below).
Unschedule This Batch Click this button to disassociate the highlighted schedule with the batch. The batch will then show no schedule name associated with it on the Batch screen.
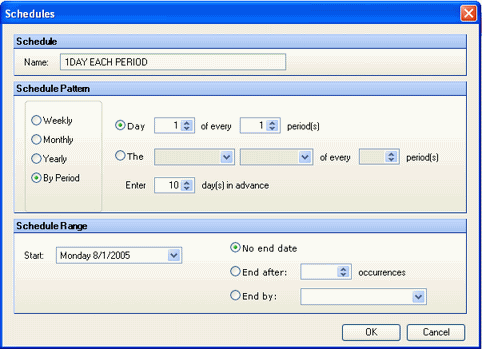
New Schedule Click this button to create a new schedule in the Schedule screen:

This screen changes depending on the Schedule Pattern you select (Weekly, Monthly, Yearly, or By Period). First name your schedule, then define its parameters. The "Enter [] day(s) in advance" field lets you determine when you would like a notification to post the transaction upon login. The Start date of the schedule must be a future date from the day you apply the schedule. When you click OK, it appears in the Detail Panel list in the following fashion:
Schedule The name you enter at the top of the screen.
Apply Date A synopsis of the schedule pattern information chosen.
To Occur The time the scheduled event should occur relative to the apply date.
Edit Click this button to edit the schedule highlighted in the detail panel.
Delete Click this button to delete the schedule highlighted in the detail panel.
Tip: If you need a recurring journal previous to the day you create the schedule you will need to manually pull the transaction into the General Journal screen. In the General Journal screen select the New Recurring Journal button then select the template to pull it in manually to the screen. Show example.