By the nature of the work done in Compeat, a large number of records are often generated. Being able to quickly access a record or group of records is an important part of being able to work effectively in Compeat.
Because of the amount of records to deal with and the importance of accessing them quickly, Compeat provides many different options for finding items— some of them simply alternative ways to accomplish the same thing; you may not use all of the options, but it would be a good idea to familiarize yourself with them in any case.
You can search all fields of a record by keyword, or refine a search to look for specific things in a specific part of a record; you can browse through a general list, or filter a list to view only a particular subset of records; finally, you can sort lists to organize the information in them in various ways.
Searching is a good way to find items if you know something specific about the item that can be used as a search term. You can either do a general search (default), finding records that have the search term anywhere in them, or do a refined search and look for terms in specific fields and/or used in specific ways.
To search Compeat for a record, you must have an opened screen of the record type that you want to search (e.g., Orders, Daily Sales Reports, etc.). When a screen is open, search options will be displayed on the toolbar.
The default search will search all fields of your records for matching terms.
To perform a general search, open the record type that you want to search; enter a search term in the search field on the toolbar, and press Enter.
You will be shown a list of all records containing your search term. Double-click on any item in the list to open the record.
Note: You may not see your search term in the list of records, as the list shows only the primary field (usually description).
A refined search allows you to use advanced features to limit the number of records retrieved. It should be used if a general search returns too many records.
To perform a refined search,
Click on the search icon ![]() in the main toolbar.
in the main toolbar.
This will open a new window with a list of all records.
Above the list of records is a search field and drop-down menus to
select parameters for the search.
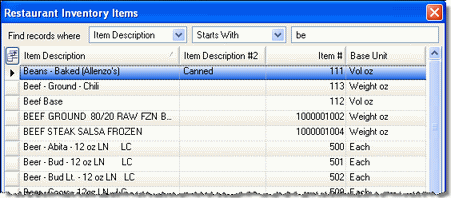
Enter a search term and use the drop-down menus to specify search parameters. The list will be updated as you enter your search criteria.
Quick
Tip:
Truncated search terms can be used; in the example above "be"
has been entered and the list has been filtered to include only records
whose Item Description starts with "be", such as beans, beef,
and beer. This is particularly useful if you are not sure of the spelling
of a word.
The available records will now be filtered based on the search criteria.
The filter icon will be highlighted to indicate when filters have been
applied to a search (i.e., when the displayed records are limited by a
filter). To remove filters, click on the filter icon ![]() .
.
Note: You can customize the appearance of a list by using
the Field Chooser to select which data columns to display. Simply click
on the Field Chooser icon![]() in
the upper left corner of the list and select the fields that you would
like to display. The system will remember your preferences for next time.
To reset to the default settings, right-click anywhere on the data and
select Restore Default Settings.
in
the upper left corner of the list and select the fields that you would
like to display. The system will remember your preferences for next time.
To reset to the default settings, right-click anywhere on the data and
select Restore Default Settings.
Quick Tip: If there is a field that you would like to see that is not visible in a list, open the Field Chooser to see if it is an option.
Sometimes it may be useful to simply browse through the available records to look for the one you want. This may be particularly useful when you don't know the details of a record.
You can alternatively view the details of a single record or a list of all records by pressing the F8 key, or choosing View > Record View/List View from the menu bar. From the list you can scroll through all of your records, sort, or filter them.
To open record from the list, double-click on it.
![]() Click to view/hide picture.
Click to view/hide picture.
Note: you cannot enter data directly when in List view; to modify a record, double-click on it in the list to go to Data Entry mode.
Quick Tip:
From List view, you can export the data directly to an Excel spreadsheet
by clicking ![]() Excel
Export at the top of the screen.
Excel
Export at the top of the screen.
You can browse records using the arrows on the toolbar at the top of the screen. This allows you to view one item at a time until you see the item you are looking for. The following tools are available:
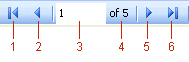
Moves to the first item.
Moves to the previous item.
Indicates the currently viewed item.
Total number of items.
Moves to the next item.
Moves to the last item.
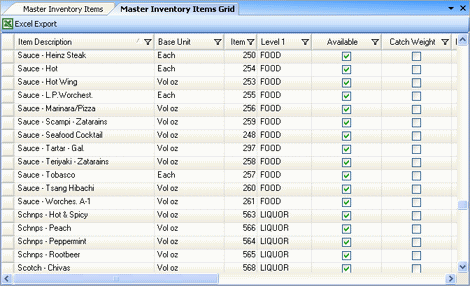
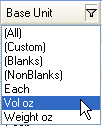
From the List View (F8), you can filter the list by clicking on the
filter icon (![]() ) over the column you want
to filter by, and then selecting a criteria from the drop-down menu.
) over the column you want
to filter by, and then selecting a criteria from the drop-down menu.
There are two types of filtering criteria:
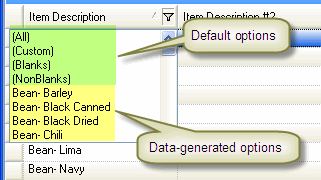
Default Options The default options allow you to perform filtering tasks that are not specific to the column.
– All removes filters and shows all records.
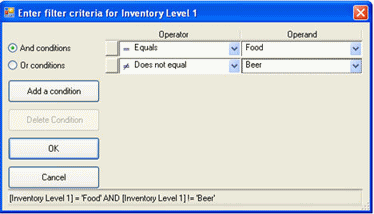
– Custom
allows you to use advanced filtering options to hone in on very specific
information in a record. When you select Custom, a dialog box similar
to the following displays:
– Blanks shows only items that have nothing entered in the selected field; any record with an entry in the selected field will be excluded.
– Non-Blanks will show all records that have any entry in the selected field. Records with the selected field blank, will be excluded.
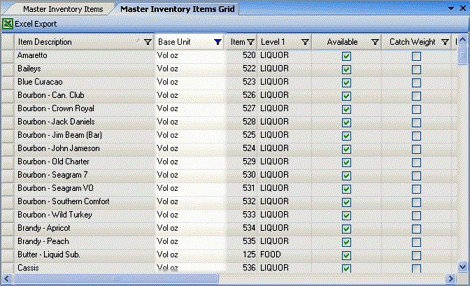
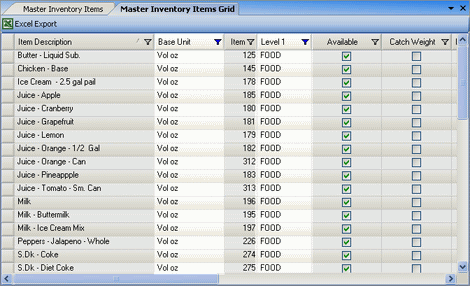
Data-Generated Options The data-generated options include all of the different entries for the field (or column) selected. When you select an criteria, only records with that criteria in the specified field will be shown in the list. For example, if you select "Bean-Barley" from the Item Description filter, only records with "Bean-Barley" in the Item Description field will be displayed. See example.
When you have selected a filter, the filter icon turns blue (![]() ).
This indicates that a filter is in use in the column. To remove it, select
(All) from the filter menu.
).
This indicates that a filter is in use in the column. To remove it, select
(All) from the filter menu.
Note: You can customize the appearance of a list by using
the Field Chooser to select which data columns to display. Simply click
on the Field Chooser icon![]() in
the upper left corner of the list and select the fields that you would
like to display. The system will remember your preferences for next time.
To reset to the default settings, right-click anywhere on the data and
select Restore Default Settings.
in
the upper left corner of the list and select the fields that you would
like to display. The system will remember your preferences for next time.
To reset to the default settings, right-click anywhere on the data and
select Restore Default Settings.
Quick Tip: If there is a field that you would like to see that is not visible in a list, open the Field Chooser to see if it is an option.
You can click on any column heading to sort the grid alphanumerically by that column (a faint triangle in the column heading area indicates if it is sorted in ascending or descending order). Click on the column header a second time to reverse the sorting order.
In addition, you can sort another column within the previous sort order by holding down the Shift key while clicking another column head.
Grouping by a single column heading
Compeat allows you to group data by a column header. The system will remember
any layout changes you make. To reset to the default settings, right-click
anywhere on the data and select Restore Default Settings.
Drag the column heading into the placement area above the detail area. As you drag the column heading, red arrows will appear to mark the placement area.
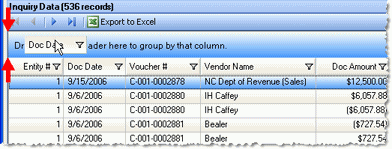
Release the mouse button to drop the header
on the placement area. ![]() Click to view/hide video.
Click to view/hide video.
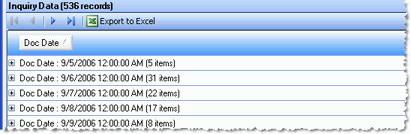
Expanding sub-categories
When grouped by header, you will initially see each category in collapsed
form; you can expand any category by clicking the plus (+) sign next to
it.
![]() Click to view/hide video.
Click to view/hide video.
Grouping by sub-column heading
To specify additional grouping levels, first expand a category, then select
a sub-column heading and drag it into the placement area:
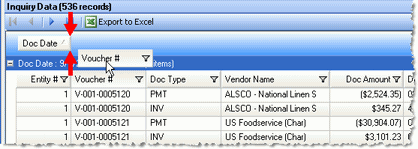
Release the mouse button to drop the header
on the placement area. ![]() Click to view/hide video.
Click to view/hide video.
Removing grouping
To remove a grouping, drag the column heading back into the detail area
and release the mouse button.
![]() Click to view/hide video.
Click to view/hide video.